By Emily · May 2026 · 7 min read
If you've just gotten a laser cutter and you're looking for your first real project — or you're a seasoned maker searching for cleaner, more reliable cut files — laser cut gift boxes are one of the best places to start. They're practical, impressive, and endlessly customizable. This guide breaks down everything you need to know about choosing and using SVG files for laser cut gift boxes.
Why Laser Cut Gift Boxes?
A handmade wooden gift box instantly elevates whatever's inside it. Whether you're packaging jewelry, a candle, a small keepsake, or a gift card, a laser cut box makes the presentation feel intentional and personal — in a way that store-bought packaging simply can't match. Beyond gifting, laser cut boxes are also a popular product for small makers selling on Etsy or at craft fairs. They're quick to cut, easy to assemble, and have a high perceived value relative to their material cost.
What to Look for in a Quality SVG Laser Cut Box File
Not all cut files are created equal. Here's what separates a well-designed file from one that will waste your time and material: Clean, closed vector paths Every cut line must be a fully closed path with no gaps or overlaps. Open paths cause the laser to either skip sections or double-cut lines, resulting in loose joints and uneven edges. Always check that your file opens cleanly in your design software before cutting. Separate layers for cut and score lines A properly structured SVG file uses different layers or colors for cut lines versus score or engrave lines. This lets you assign the correct laser operation to each element without any manual editing. Kerf compensation built in Kerf is the tiny sliver of material the laser removes as it cuts. Without kerf compensation, tab-and-slot joints will either be too loose or too tight. Quality files account for this automatically, so your box assembles snugly without glue — and even better with it. Compatible file formats Look for files that include both SVG and DXF formats. SVG works natively in most laser software including LightBurn, xTool Creative Space, and the Glowforge App. DXF is preferred for software like AutoCAD or CorelDRAW. Having both gives you full flexibility.
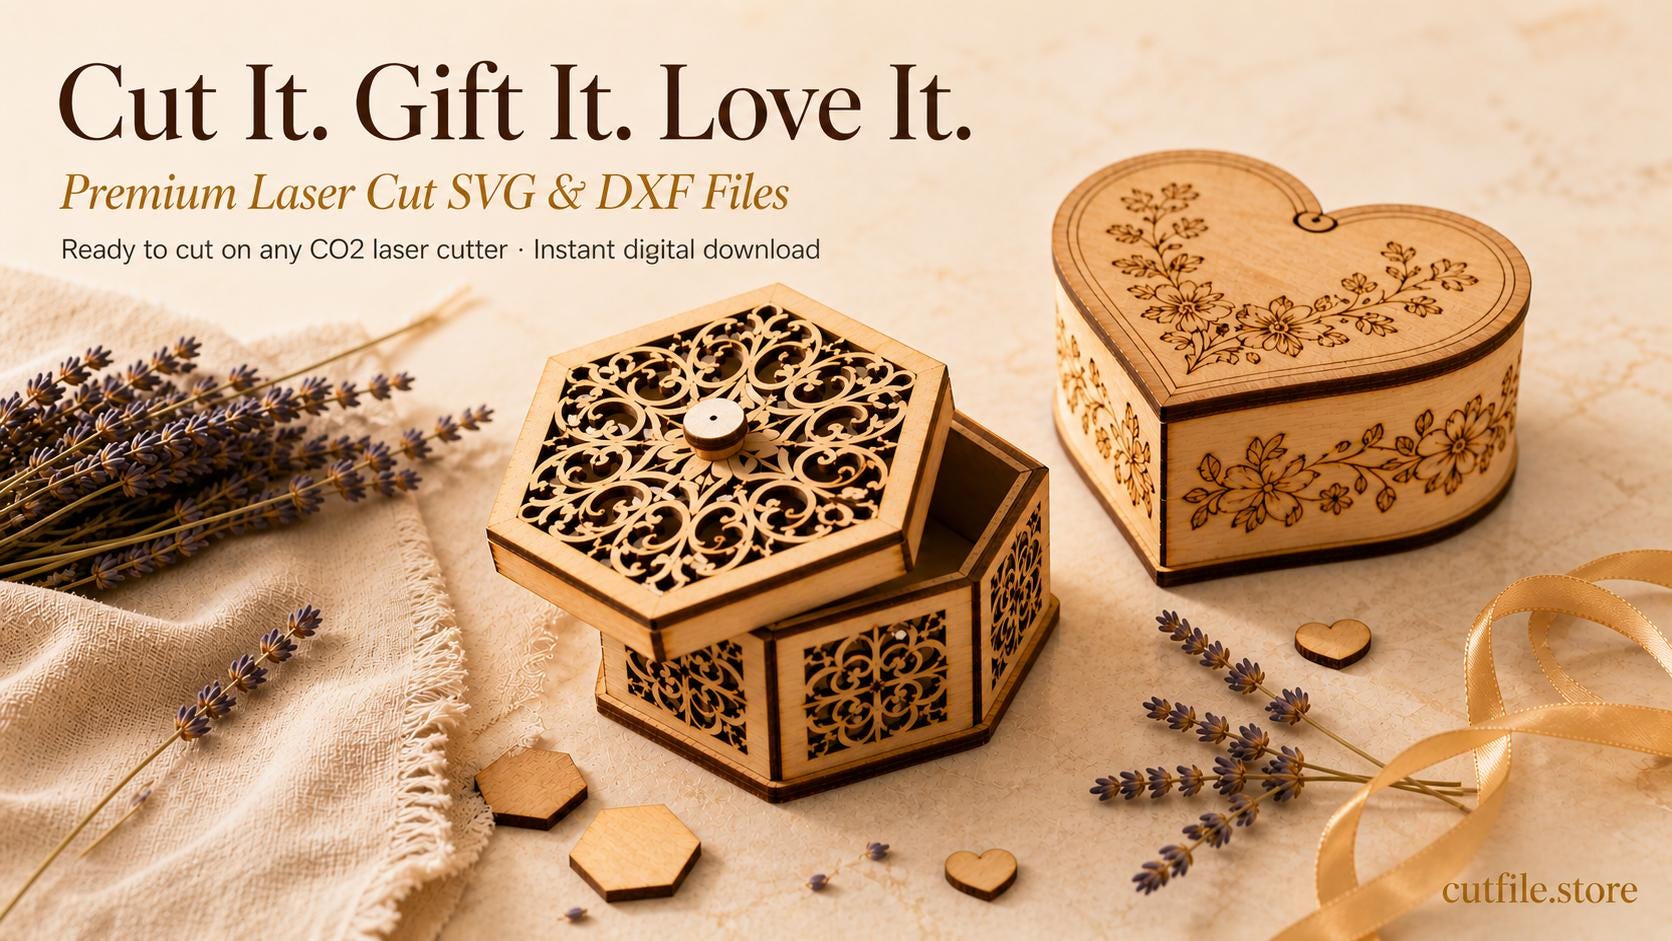
Types of Laser Cut Gift Boxes
Hinged lid box
One of the most popular styles — a living hinge or separate lid that stays attached to the box body. Great for jewelry, keepsakes, or anything the recipient will open and close repeatedly. The living hinge is created by a laser-cut pattern of thin slots that allows rigid wood to flex.
Sliding lid box
A sleek, modern design where the lid slides in a channel along the top of the box. Minimal assembly, very clean look. Works beautifully with engraved patterns on the lid.
Tray-and-lid box
Two separate pieces — a base tray and a top lid — that stack together. Simple to assemble and great for displaying gifts like candles or small products. Very beginner friendly.
Decorative storage box
A deeper, roomier box with engraved side panels and a removable lid. Perfect for organizing jewelry, craft supplies, or desk accessories — and doubles as a beautiful home decor piece.
What Materials Work Best for Laser Cut Gift Boxes?
One of the best things about using SVG and DXF cut files is that they work across a wide range of materials — as long as your machine is a CO2 laser cutter. Here are the most popular options:
Wood (plywood, basswood, MDF): The classic choice. Warm, natural look, easy to stain or paint, and widely available. Plywood and basswood cut cleanly and hold tab-and-slot joints well. MDF is denser and gives a smoother finish — great for engraved designs.
Acrylic: Cuts with crisp, polished edges and comes in dozens of colors and finishes. Frosted or colored acrylic gift boxes look incredibly modern and luxurious. Use thicker sheets for structural integrity.
Leather: A less common but stunning option. Laser cut leather boxes have a high-end, artisan feel — perfect for jewelry or small accessories.
Cardboard and chipboard: Ideal for lightweight packaging, favors, or prototyping. Much faster to cut than wood and very inexpensive for testing new designs.
All cut files from CutFile.store are compatible with any CO2 laser cutter and any of these materials — no adjustments needed to the file itself.
Which Laser Cutters Are Compatible?
SVG and DXF files work with virtually every CO2 laser cutter on the market today, including:
- Glowforge (Plus, Pro, Aura) — import SVG directly into the Glowforge App
- xTool (S1, P2, F1) — use xTool Creative Space or LightBurn
- Sculpfun, OMTech, Thunder Laser — open in LightBurn or RDWorks
- Any other CO2 laser cutter that accepts SVG or DXF input
The file does the work — your machine just needs to be able to read SVG or DXF, which every CO2 laser cutter sold today can do.
How to Use an SVG Gift Box File — Quick Start
Step 1 — Download and unzip your file
Most digital files come in a ZIP archive. Extract the contents to find your SVG, DXF, and any included instructions or README file.
Step 2 — Open in your laser software
Import the SVG into your preferred laser software. The cut lines and score lines should appear on separate layers or in different colors. Assign Cut to the outer profile lines and Score or Engrave to any detail or decoration lines.
Step 3 — Set your material and run a test
Place your material in the machine and set your speed and power based on your material type and thickness. Always run a small test cut in a corner of your material before cutting the full design — this lets you verify your settings without wasting a full sheet.
Step 4 — Cut, remove, and assemble
Once cut, pop the pieces out of the sheet. Dry-fit them first to check alignment, then apply a small amount of wood glue to the joints if needed. Use painter's tape to hold everything square while the glue sets.
Tips for a Professional Finish
- Sand lightly before assembly: A quick pass with fine-grit sandpaper on the flat surfaces makes the finished piece feel much more refined.
- Remove laser residue: After cutting wood, wipe the cut edges with a slightly damp cloth or a soft brush to remove any soot before gluing.
- Add a finish: Danish oil, beeswax, or a matte spray sealant brings out the grain and gives your box a polished, finished look.
- Personalize it: Most laser software lets you add text or simple engraving directly to the design file — a name, date, or short message makes any gift box feel truly special.
Frequently Asked Questions
What is the difference between SVG and DXF files?
Both SVG and DXF are vector file formats used for laser cutting. SVG (Scalable Vector Graphics) is web-based and works natively in most modern laser software. DXF (Drawing Exchange Format) is an older CAD format preferred in engineering software like AutoCAD and CorelDRAW. Most quality laser cut file shops include both formats in every download.
Can I resize the box to a custom size?
Yes — vector files can be scaled up or down in your laser software or in a program like Inkscape. Keep in mind that if you change the size significantly, you may need to adjust the tab and slot dimensions to account for your material thickness. Some advanced file packs include multiple size variants to make this easier.
Do I need design experience to use these files?
Not at all. Ready-to-cut SVG files are designed to be used straight from the download — no design skills required. Just open the file in your laser software, set your material, and cut. If you want to add personalized text or engraving, basic tools in LightBurn or the Glowforge App make that easy too.
Are these files suitable for selling finished products?
Most commercial-use laser cut files, including those from CutFile.store, include a commercial license — meaning you can sell the finished physical products you make from the files. Always check the license terms included with your download to confirm.
Ready to make your first laser cut gift box? Browse our full collection of gift box SVG and DXF files at CutFile.store — all tested, kerf-corrected, and compatible with every CO2 laser cutter.